
NancyFx is a lightweight, low-ceremony, framework for building HTTP based services on .NET and Mono. The goal of the framework is to stay out of the way as much as possible and provide a super-duper-happy-path to all interactions. Advantage of NancyFx is, it prefers conventions over configuration and supports DELETE, GET, HEAD, OPTIONS, POST, PUT and PATCH requests and provides a simple and elegant way to return response with just a couple of keystrokes. In this post, let’s find out how to use NancyFx in ASP.NET Core.
Use NancyFx in ASP.NET Core
Before we move to using NancyFx with ASP.NET, here is some advantage of NancyFx.
- No configuration required. The framework is easy to setup, customize and no need to go through configuration hell just to get up and running.
- Its host-agnostic and runs anywhere which means you can run it on IIS, WCF, embedded within an EXE, as a windows service or within a self hosted application.
- Built in Dependency Injection.
I recommend you to read the post Why use NancyFX?.
Let’s see how to use it in the ASP.NET Core application. First, let’s create an empty ASP.NET Core application and open Project.json to include NancyFx. You need to include 2 nuget packages.
- Microsoft.AspNetCore.Owin: “1.0.0”
- Nancy: “2.0.0-barneyrubble”
{
"dependencies": {
  "Microsoft.NETCore.App": {
    "version": "1.0.0",
    "type": "platform"
  },
  "Microsoft.AspNetCore.Diagnostics": "1.0.0",
  "Microsoft.AspNetCore.Server.IISIntegration": "1.0.0",
  "Microsoft.AspNetCore.Server.Kestrel": "1.0.0",
  "Microsoft.Extensions.Logging.Console": "1.0.0",
  "Microsoft.AspNetCore.Owin": "1.0.0",
  "Nancy": "2.0.0-barneyrubble"
},
Now we need to make sure the Nancy handles the request, instead of the ASP.NET runtime. So open Startup.cs and look for Configure method. And add the highlighted line of code.
public void Configure(IApplicationBuilder app, IHostingEnvironment env, ILoggerFactory loggerFactory)
{
    loggerFactory.AddConsole();
    if (env.IsDevelopment())
    {
        app.UseDeveloperExceptionPage();
    }
    app.UseOwin(x => x.UseNancy());
}
Now we need to create a Module that will handle the request. Modules are the lynchpin of any given Nancy application. Modules are the one thing you simply cannot avoid because they are where you define the behavior of your application. You can think of a module like the Controller in ASP.NET MVC or WEB API.
Although you can place module classes anywhere but ideally you should put them inside a “Modules” directory. So create a Modules directory and add create a new class “HomeModule” as follows,
public class HomeModule : NancyModule
{
public HomeModule()
{
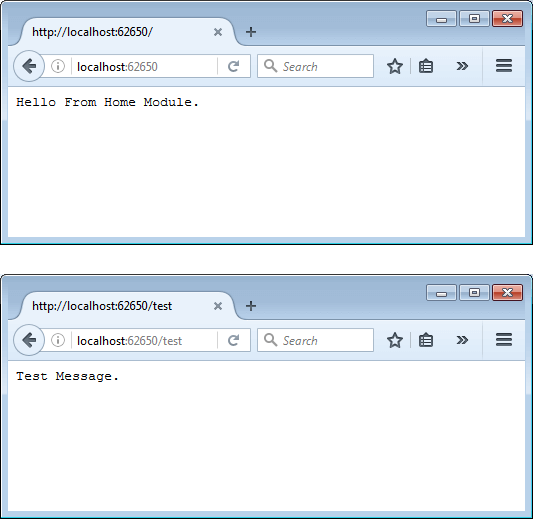
Get("/", args => "Hello From Home Module.");
Get("/test", args => "Test Message.");
}
}
A module is created by inheriting from the NancyModule class; it’s as simple as that. Above code defines a Nancy Module, which can handle 2 different GET request and returns the plain text as response.
You need to have at least one module defined in your application. Although you can have as many modules as you like in your application. So let’s define another module which is a little complex. Below code defines ProductModules which handles 3 different requests.
/products/: A get request which returns list of products./products/{id}: Another get request which returns name of the product matching the id value./product/create/{Name}: A Post request which adds product to list.
public class ProductModules : NancyModule
{
   public static int nProductId = 1;
   public static List<Product> lst = new List<Product>();
   public ProductModules() : base("/products")
   {
       Get("/", args => GetProductList());
       Get("/{id:int}", args => GetProductById(args.id));
       Post("/create/{Name}", args =>
       {
          lst.Add(new Product() { Id = nProductId++, Name = args.Name });
          return HttpStatusCode.OK;
       });
    }

   public List<Product> GetProductList()
   {
       lst.Add(new Product() { Id = nProductId++, Name = "Bed" });
       lst.Add(new Product() { Id = nProductId++, Name = "Table" });
       lst.Add(new Product() { Id = nProductId++, Name = "Chair" });
       return lst;
   }

   public Product GetProductById(int Id)
   {
       return lst.Find(item => item.Id == Id);
   }

   public class Product
   {
       public int Id { get; set; }
       public string Name { get; set; }
   }
}
Here is the response of all the product’s API using Postman tool.

That’s it. NancyFx is very modular and flexible. We saw that it is really easy to integrate NancyFx with ASP.NET Core. Once integration is done, you can start writing your code quickly and you can easily define routes for modules and HTTP verb commands. Hope you liked it.
It would be really nice to have Swagger for NancyFx also like ASP.NET Core Web API but unfortunately at this moment there are no nuget packages available for .NET Core.
Thank you for reading. Keep visiting this blog and share this in your network. Please put your thoughts and feedback in the comments section.

super